|
Ford / Lincoln /Mercury
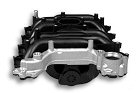
4.6L Intake Manifold Repair
|
|
Removal and Replacement Instructions
(steps 51-60 of 60)
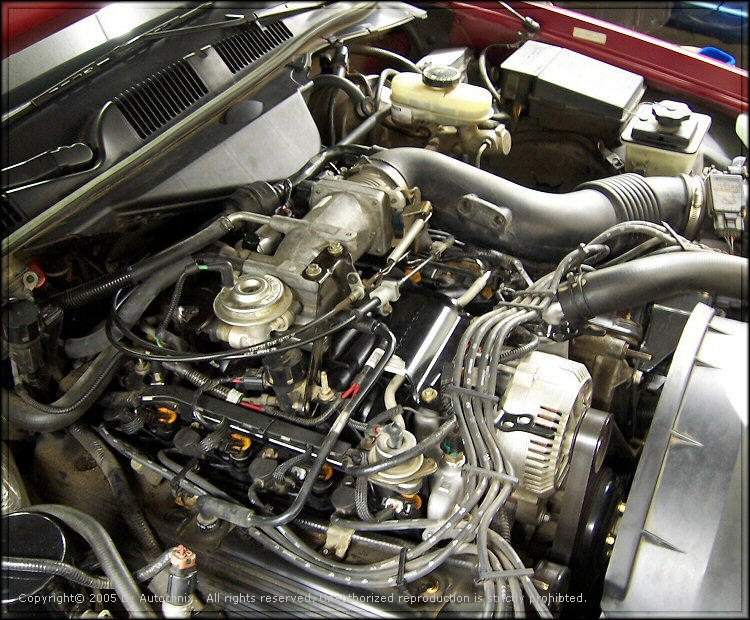
- Re-connect vacuum line to front base of throttle and diaphragm on front right of fuel rail.
- Re-install front throttle cable bracket (3 bolts) and re-connect throttle cables and throttle return spring.
- Re-install PCV valve, line and vacuum hose (to right base of throttle body).
.jpg)
- Before installing the new thermostat, fill engine block with coolant (50/50 water & antifreeze using a funnel to fill the engine using the thermostat housing opening. Additionally, fill the coolant overflow reservoir to the "Full Cold" mark.
NOTE: Many Ford/Mercury cars do not have a traditional radiator cap so we found this to be the most
direct way to get coolant back into the engine. Since the car lost most of it's coolant when the manifold
ruptured and since the water pump doesn't make a very good air pump you need to have some coolant in the
system to get a good flow going when the thermostat first opens up. You will need to add additional coolant
after running the car for while as well. This can be done through the normal procedure of adding coolant to
the coolant reservoir tank.
|
|
|
|
- Install the new thermostat and O-ring (provided in the intake manifold kit) and re-install
the thermostat housing (water neck) using the spacers provided in the kit. Be careful not to "pinch"
the O-ring when tightening the thermostat housing. Be careful to tighten the (2) thermostat housing bolts
evenly using a side-to-side alternating tightening sequence. If you removed the
upper radiator hose from the thermostat housing then re-install the upper radiator hose at this
time as well. This is a great time to install a new upper radiator hose if your existing hose
is visibly worn, bulging or "soft".
- Re-install air intake tube and connect (2) vacuum lines and tighten hose clamps.
- Double check all of your electrical connections, spark plug wire connections, fuel injector connections, vacuum hose connections, throttle cable return spring connections and make sure the serpentine belt is in place as it should be.
- Re-connect the negative battery terminal (13mm wrench).
- Crank the car with the hood open and look for leaks (coolant or fuel). If the engine fails to start or runs rough check the trouble shooting section below for possible solutions. Coolant will not flow through the intake manifold until the engine becomes sufficiently hot to cause the thermostat to open. MONITOR THE TEMPERATURE GAUGE. If you have insufficient coolant in the engine the water pump has nothing to pump. As such, the engine will overheat and you won't see any visible indications under the hood (no steam, etc.). Watch the temperature gauge closely. It should eventually move to approximately mid-way between "C" and "H" and stabilize. The coolant level in the coolant overflow tank should drop some as well as the engine pulls in coolant to fill any air gaps left from the disassembly process. Add coolant as necessary to the coolant reservoir being careful not to remove the cap while the engine/coolant is hot (read the cautions on the cap). Refer to (and repeat if necessary) step 54 and it's related note if the engine continues to overheat. If the engine won't crank of if you're other having problems, go to the next page and check out the Troubleshooting section.
CAUTION: DO NOT remove any hoses, do not remove the thermostat
housing and do not open the coolant reservoir cap while the engine is hot. Serious burns could occur.
- If there are no coolant leaks and no fuel leaks and the engine is running smoothly then CONGRATULATIONS! You just saved yourself $500 in repair labor (and have the satisfaction of knowing you did it yourself - with a little help from us). Tell your friends and family that you showed that intake manifold who's boss (they don't have to know it was a plastic intake manifold). Also, please take a minute to drop us a line and give us some feedback on the content of this site. We're always trying to improve our content and we love getting feedback from fellow Do-It-Yourselfers
|
|

Previous
|

Next
|
Copyright © 2005-2015 by AutoClinix. All rights reserved. Unauthorized duplication in whole or in part is strictly prohibited.
|
|